2.3. Excel
2.3.1. Introduction
The Excel integration works with our ODBC driver.
We will guide you through the process of:
installing the driver
adding a datasource
connecting to it in Excel
querying directly to import data
exploring your tables
editing a chosen dataset
2.3.2. Installation
You can check detailed instructions for ODBC
You can install the driver with our specific ODBC driver setup: qdb-odbc-driver-[version]-windows-64-bit-setup or its 32bit counter part.
You can choose the folder where you want it installed and that’s it!
Caution: Using the uninstaller will automatically remove the driver.
You can check detailed instructions in the installation part ODBC documentation.
2.3.3. Datasource
The best way to create a datasource is to open a powershell window and using odbcconf.exe
odbcconf.exe CONFIGDSN "qdb_odbc_driver" "DSN=quasardb|Driver=qdb_odbc_driver|URI=qdb://127.0.0.1:2836"
It’s especially useful if you wish to connect to a secured cluster:
odbcconf.exe CONFIGDSN "qdb_odbc_driver" "DSN=quasardb|Driver=qdb_odbc_driver|URI=qdb://127.0.0.1:2836|UID=user_name|PWD=user_private_key|KEY=cluster_public_key"
You can add as many parameters as you wish in the secondary string.
Here is a list of the most common parameters, you can either set them in the dsn or the connection string you use.
Parameter
Description
LOGDIR
A path to the folder in which you wish our log file to be stored
URI
A cluster URI you wish to connect to
UID
The username you log in with
PWD
The password associated with the user
KEY
The cluster public key file content
DSN
The name of the datasource
DESCRIPTION
A description of this specific datasource
Any unmentionned field will be filled with a default value.
2.3.4. First connection
For the rest of this tutorial, the screenshot come from Excel 2016, differences could come up if you use a different version.
The ODBC driver use a connection string filled in the Excel prompt, but first we need to get to this prompt.
Go to the Data tab:
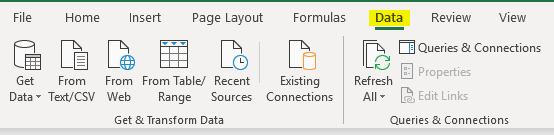
Then Get Data -> From Other Sources -> From ODBC:

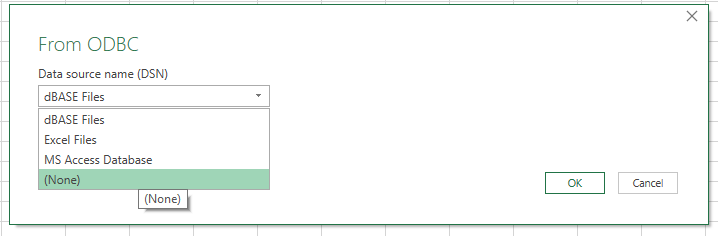
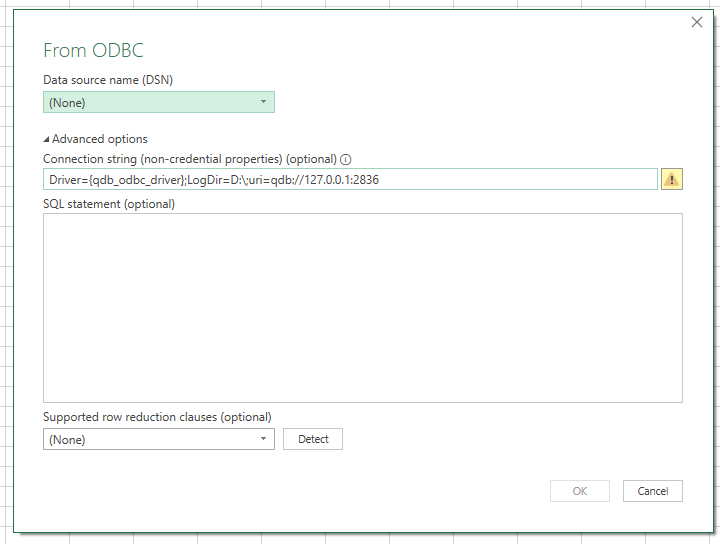
The following window opens:
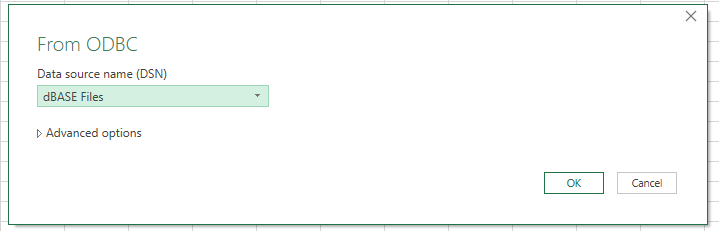
Open the dropdown menu and select None:
Select Advanced options:
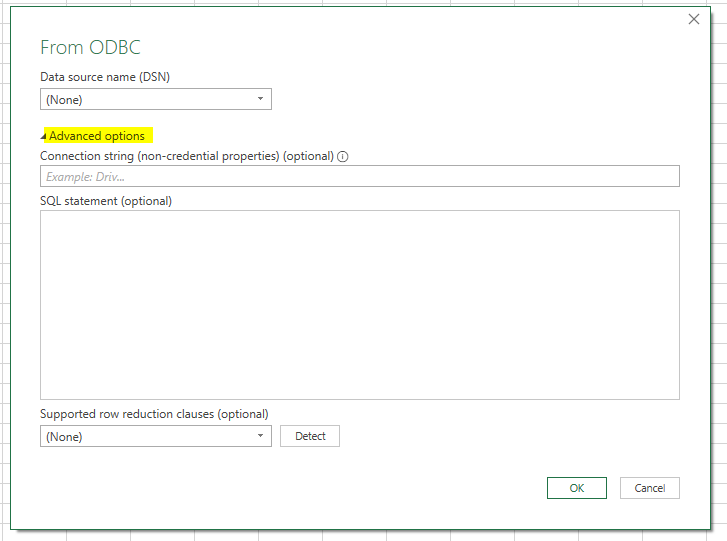
The first field in the advanced options is the connection string.
The connection string is a semi-colon separated list of arguments.
2.3.4.1. Examples
Driver={qdb_odbc_driver}
**Driver={qdb_odbc_driver};LogDir=C:Program Filesquasardblog**
Driver={qdb_odbc_driver};URI=qdb://127.0.0.1:2836
Driver={qdb_odbc_driver};UID=tintin;PWD=tintin_key;KEY=cluster_public_key
2.3.4.2. Detail
Whatever options you need afterward, you need to register which driver you wish to use.
In our case the connection string begins with: Driver={qdb_odbc_driver}
Then you can add the following arguments:
LogDir: the path to the folder in which you wish our log file to be stored.
URI: the cluster URI you wish to connect to.
And these security parameters:
UID: the user name you log in with.
PWD: the password associated with the user.
KEY: the cluster public key file content.
You can find your UID and PWD in your user private credentials file.
Enter your connection string, and optionnally a query in the next field as shown in the Querying data step of this tutorial.
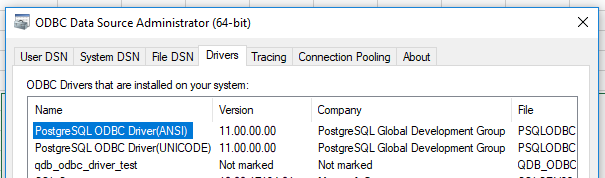
If you see a warning sign on the right of the field (as it is on the previous picture) it means the driver was not properly installed, or that the driver name is not the correct one.
You can check this information in the ODBC data source administrator in windows under the Drivers tab:
Connecting to a secured cluster:
In the second screen, if you are connecting to a secured cluster you can fill your UID, PWD, and KEY parameters.
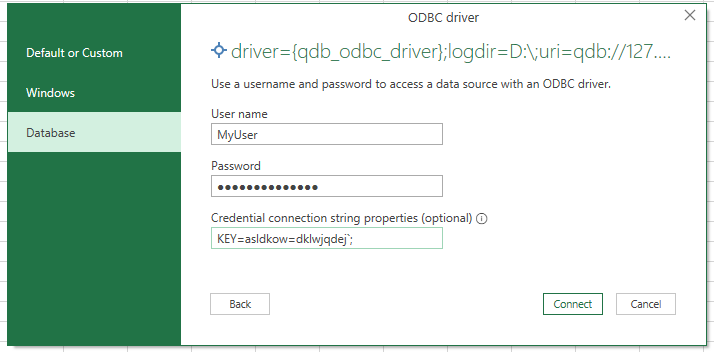
If you are not connecting to a secured cluster, don’t fill anything and just click on connect.
2.3.5. Querying data
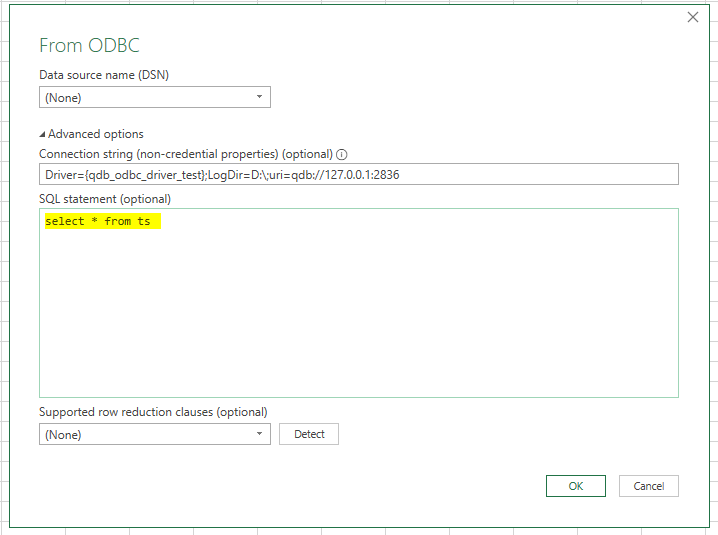
As an optional field in the advanced options you can set an SQL statement, use our query language directly in this field.
For example, if you have a timeseries named ts you could select everything with this query:
Then click ok, the following window shall appear (possibly after a second window containing login information):
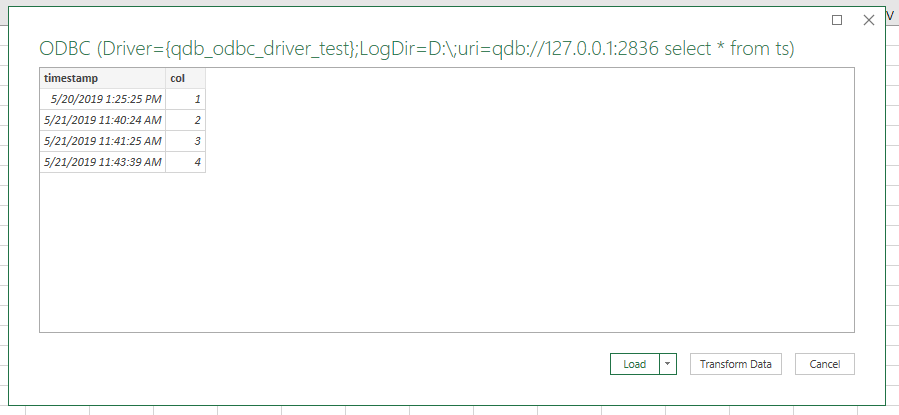
Click on Load
2.3.6. Exploring your tables
Click ok from where we left out in the connection step, you will be prompted with the Navigator windows.
It will list all the timeseries in your database, which could be a lot, but you can filter them with the search field at the top left of the window.
Click on it on one table to show a preview of the timeseries:
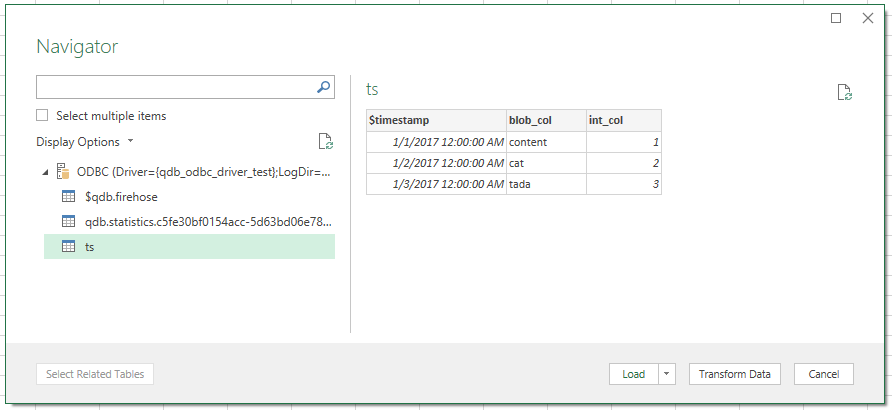
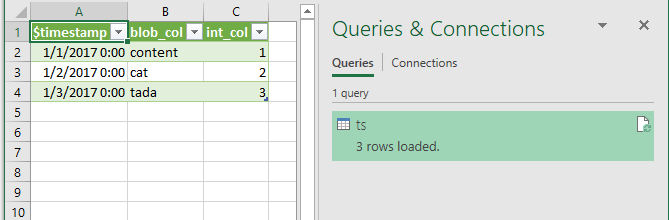
Load and enjoy your freshly imported data.
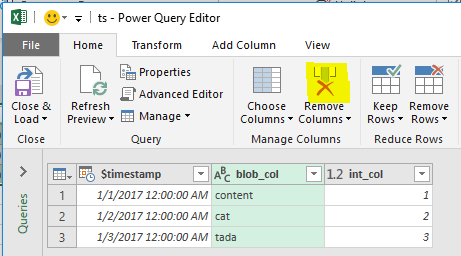
2.3.7. Editing your dataset
You can select which columns should show up by right-clicking on the ts query in Queries & Connections on the right of your screen:
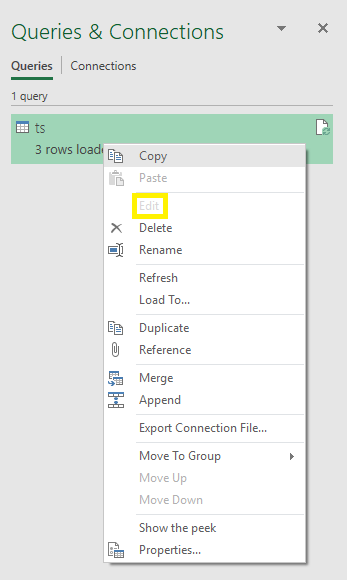
You can then select one or more column(s) with left clicks, and then click on Remove Columns icon:
Click Close & Load on the top left of this window.
Your data shall only contain the columns you did not remove, and this will end this tutorial, congratulations!