3.5. ODBC#
3.5.1. Abbreviations#
ODBC - Open Database Connectivity
DSN - Data Source Name
3.5.2. Introduction#
The ODBC driver is our way of making it easier for you to use QuasarDB with a standard interface.
3.5.2.1. ODBC#
ODBC (Open Database Connectivity) is a standard way to connect and work with databases. ODBC uses drivers to help your applications talk to different database systems. These drivers act as middlemen, translating what your application says into something the database understands.
ODBC is designed to work on many different systems, like Windows and Linux, as long as the right ODBC driver is available for that system. It uses something called a DSN (Data Source Name) to store information about how to connect to a specific database. This information includes where the database is, how to log in, and other connection details.
For a database system to work with ODBC, it needs to have its own ODBC driver.
3.5.2.2. Datasource#
A data source is a specific configuration or connection to a QuasarDB. It provides the necessary information to establish a connection to a database, such as the server’s address, database name, authentication credentials, and other connection parameters.
3.5.3. Installation#
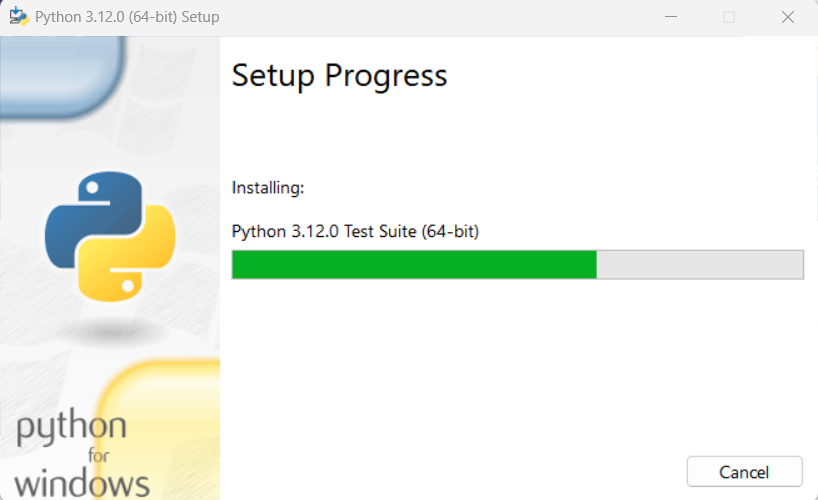
Python Installation:
- If you don’t have Python installed, you can follow these steps:
Visit the Python website .
Download the latest version of Python.
Follow the installation instructions.
QuasarDB Setup:
- To set up QuasarDB, follow these steps:
Go to the QuasarDB download website .
Download the QuasarDB setup (
setup.exe) designed for Windows.Follow the installation instructions.
Downloading QuasarDB ODBC for Windows:
- To download the QuasarDB ODBC driver for Windows, take the following steps:
Start by visiting the QuasarDB download website .
Look for the ODBC driver setup (
setup.exe) specifically designed for Windows.
Running the QuasarDB ODBC Installer:
- Once you’ve downloaded the ODBC driver, execute the installer with these instructions:
After downloading, locate the QuasarDB ODBC installer on your computer.
Double-click the installer to run it.
The installation process includes the following steps:
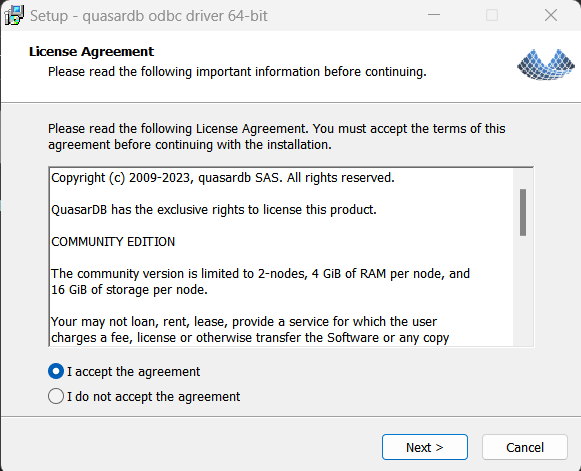
- 2.1.1 Accepting the User Agreement
After running the QuasarDB ODBC installer, you will encounter the License Agreement screen.
To proceed, you must read and accept the terms and conditions outlined in the agreement.
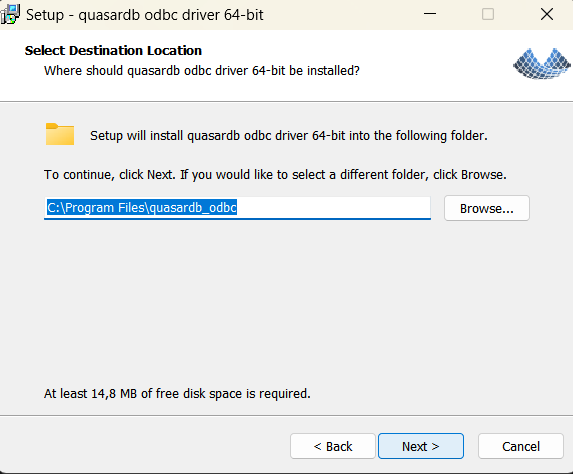
- 2.1.2. Specifying the Installation Destination
Following the user agreement, you will be prompted to specify the installation destination for the QuasarDB ODBC driver.
You can choose the installation folder or directory where the driver files will be placed.
It’s essential to review and confirm the installation location, ensuring it aligns with your preferences. You can use the default folder or customize it if necessary.
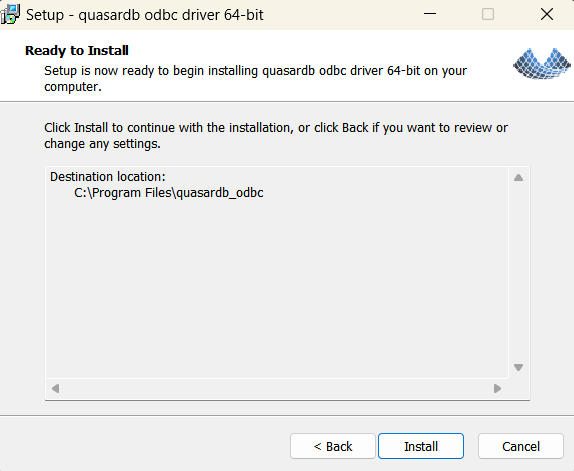
- 2.1.3. Confirming Readiness to Install
Once you have selected the installation destination, the installer will review your choices and display a summary of the installation settings.
This summary provides a final opportunity to verify that the installation will proceed as expected. Ensure all your selections, including the installation location, are accurate.
Click on Install button to proceed and confirm your choices.
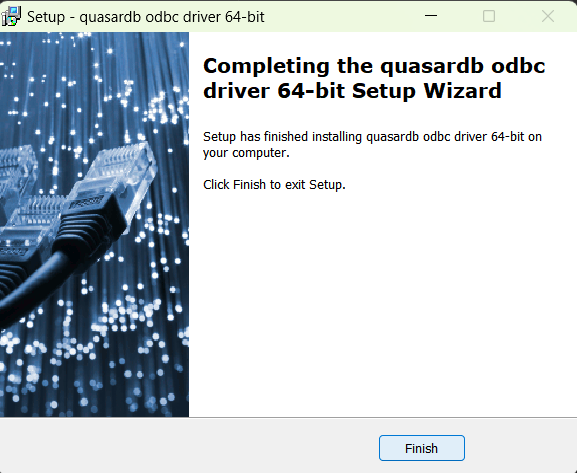
- 2.1.4. Completing the Setup with a Finish Button
After clicking on Install, the installation process will begin. You will see a progress bar indicating the installation’s status.
Upon successful completion of the installation, you will encounter a screen below.
At this point, you will be prompted to click a Finish button to close the installer and complete the installation process.
By following these individual steps, you ensure a smooth and accurate installation of the QuasarDB ODBC driver on your Windows system. These steps are designed to guide you through the installation process with clarity and ease.
Caution: Using the uninstaller will automatically remove the driver and any datasource associated with it.
Installing from the Zip Archive:
If you choose to install the QuasarDB ODBC driver from a zip archive, follow these steps:
In the zip archive, you will find the “qdb_odbc_installer.exe” under the “bin” folder.
Open a terminal of your choice.
Unzip the file.
Execute the installer using the following command, where the first parameter is the name of the driver, and the second is its path (it is recommended to set an absolute path):
$ qdb_odbc_installer.exe --install qdb_odbc_driver \path\to\qdb_odbc_driver.dll
By following these steps, you can install the QuasarDB ODBC driver from the zip archive with ease.
Note: You can choose the folder where you want it installed. If you choose to unzip the zip file as a standalone, be aware that you will need the C API as well.
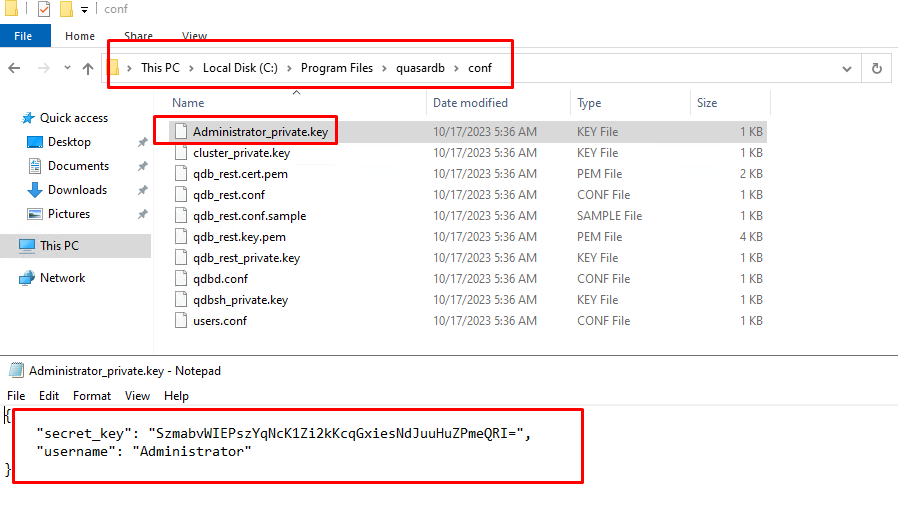
3.1 Gather your login credentials
Before you set up a DSN for QuasarDB ODBC, you need to gather your login credentials. In this tutorial, we will use the Administrator user that the QuasarDB installer created.
Open the key file located at C:\\Program Files\quasardb\conf\Administrator_private.key. Inside this file, you will find the secret_key and username. Make note of these credentials.
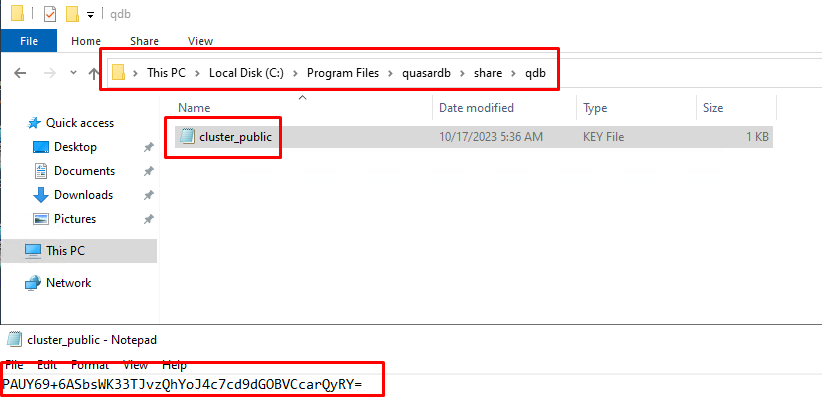
3.2 Obtain the Cluster Public Key
To access the QuasarDB cluster, you also need the cluster public key.
The default path for the cluster public key is typically C:\\Program Files\quasardb\share\qdb\cluster_public. Make note of the location of this file.
3.3 Adding datasource with two options
- 3.3.1 Create the DSN Using
odbcconf.exe Open PowerShell with administrative access. - Search for PowerShell in the Windows Start menu. - Right-click on PowerShell. - Choose Run as administrator.
Create a DSN using the odbcconf.exe command. Replace <Username> and <secret_key> with your actual credentials, and <cluster_public_key>. Use the following command format:
$ odbcconf.exe CONFIGDSN "qdb_odbc_driver" "DSN=quasardb_local|Driver=qdb_odbc_driver|URI=qdb://127.0.0.1:2836|UID=<Username>|PWD=<secret_key>|KEY=<cluster_public_key>"
Another useful commands:
$ odbcconf.exe CONFIGDSN "qdb_odbc_driver" "DSN=quasardb|Driver=qdb_odbc_driver|URI=qdb://127.0.0.1:2836"
It’s especially useful if you wish to connect to a secured cluster:
$ odbcconf.exe CONFIGDSN "qdb_odbc_driver" "DSN=quasardb|Driver=qdb_odbc_driver|URI=qdb://127.0.0.1:2836|UID=user_name|PWD=user_private_key|KEY=cluster_public_key"
You can also add a specific MaxInBufferSize or MaxParallelism:
$ odbcconf.exe CONFIGDSN "qdb_odbc_driver" "DSN=quasardb|Driver=qdb_odbc_driver|URI=qdb://127.0.0.1:2836|MaxInBufferSize=524288|MaxParallelism=2"
You can add as many parameters as you wish in the secondary string.
Any unmentionned field will be filled with a default value.
You can find more information about odbcconf.exe in the Microsoft documentation by visiting the following URL: Microsoft ODBC Configuration Tool (odbcconf.exe) Documentation
- 3.3.2 You can also add it with the windows GUI
To do so, open the windows search, type odbc, you should see and open the follwing program: “ODBC Data Sources (64bit)”:
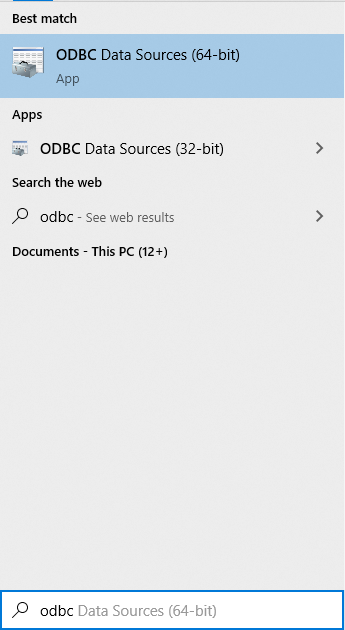
It should have opened this window:
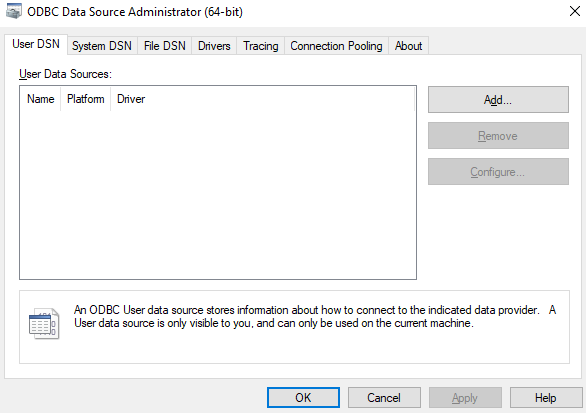
Click on the Add… button on the right side, and then Finish on the dialog box:
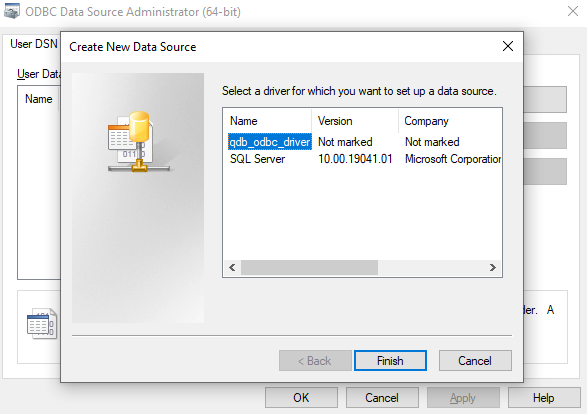
It will automatically add a default datasource.
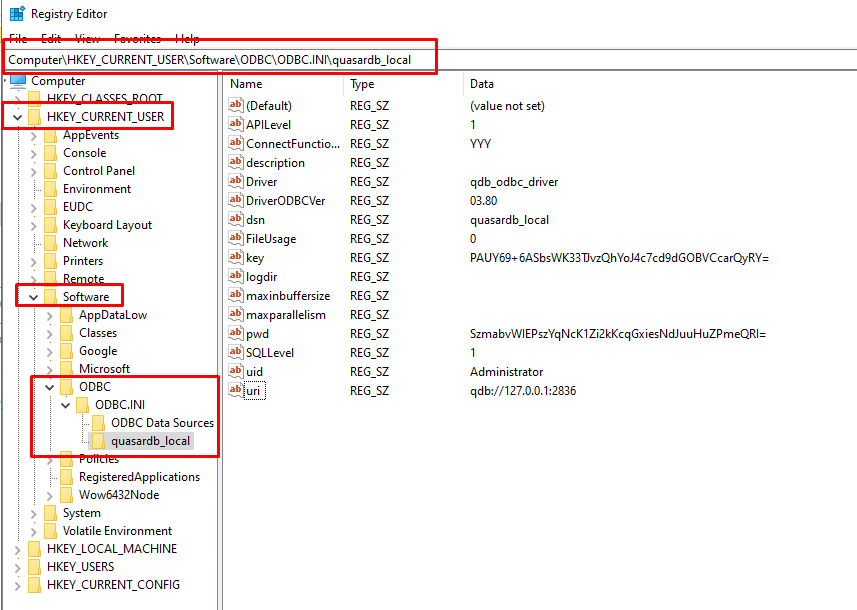
3.4 Check Registry Editor
Registry Editor is a tool on your computer that allows you to view and adjust various settings, but it’s best used with caution, as making the wrong changes can affect your computer’s performance.
Your DSN is like a hidden gem in your computer at Computer\\HKEY_CURRENT_USER\Software\ODBC\ODBC.INI and there you’ll find it, under the name quasardb_local – your gateway to connecting with data!
4.1 Test the DSN Using Pyodbc
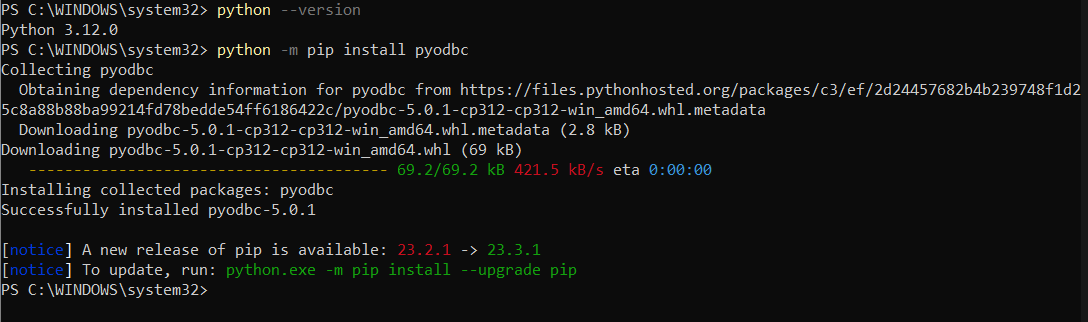
Ensure that pyodbc is installed on your system by running the following command in PowerShell:
$ python -m pip install pyodbc
Open Notepad
$ notepad example.py
Create a script file with the following Python code. Make sure to remember the DSN (Data Source Name) you want to test and the query you wish to execute:
import pyodbc

# Connect using DSN
conn_config= "uri=qdb://127.0.0.1:2836;driver:qdb_odbc_driver;logdir=./;log_level=3"
connection = pyodbc.connect(conn_config)

# Prevent encoding errors
connection.setencoding('utf-8')
connection.setdecoding(pyodbc.SQL_CHAR, encoding='utf-8')
connection.setdecoding(pyodbc.SQL_WCHAR, encoding='utf-8')
connection.setdecoding(pyodbc.SQL_WMETADATA, encoding='utf-8')

# Define your query
query = 'SELECT * FROM test" IN RANGE(now, -1h);'

# Create a cursor and execute the query
cursor = connection.cursor()
cursor.execute(query)

# Display the results
for row in cursor.fetchall():
   print(row)
4.2 Run the Script
Execute the script you’ve created by running it with Python. If everything is set up correctly and your DSN is functioning, you should receive a response from the server, displaying the query results.
$ python example.py

Imagine you have a computer running a Linux-based operating system, and you want to use a database to store and retrieve data for your applications. UNIX ODBC acts as a universal translator. It allows your applications to talk to any of these databases without needing to understand the nitty-gritty details of each one.
If you’d like to learn more about UNIX ODBC, you can visit the official website .
Check your OS distibution using the following command:
$ cat /etc/os-release
Before setting up the QuasarDB ODBC driver on your Linux system, you need to have UNIX ODBC installed. To install UNIX ODBC, follow these steps based on your Linux distribution:
For Debian-based distributions:
$ sudo apt update
$ sudo apt install -y unixodbc
For RHEL-based distributions:
$ sudo yum install -y unixODBC
For SUSE OS:
$ sudo zypper install -y unixODBC
After installing UNIX ODBC, you’ll need to configure it. Find the config files by running:
$ odbcinst -j
This command is used to retrieve important information about the configuration and setup of ODBC drivers on your system.
The driver config file is usually located at /etc/odbcinst.ini, and the data source config file is at /etc/odbc.ini.
To open this file use any editor of your choice, for example:
$ sudo nano /etc/odbcinst.ini
To use the QuasarDB ODBC driver, you also need the QuasarDB API.
Why the QuasarDB API?
The QuasarDB API is like the language lessons for our translator (the ODBC driver). It teaches the translator how to understand the specific language spoken by the QuasarDB database.
Follow these steps to install it based on your Linux distribution:
For Debian-based distributions:
$ wget https://download.quasar.ai/quasardb/3.14/3.14.2/api/c/qdb-api_3.14.2.deb
$ sudo dpkg -i qdb-api_3.14.2.deb
For RHEL-based distributions:
$ wget https://download.quasar.ai/quasardb/3.14/3.14.2/api/c/qdb-api-3.14.2-1.x86_64.rpm
$ sudo rpm -ivh qdb-api-3.14.2-1.x86_64.rpm
For SUSE:
$ wget https://download.quasar.ai/quasardb/3.14/3.14.2/api/c/qdb-3.14.2-linux-64bit-c-api.tar.gz
$ tar xzf qdb-3.14.2-linux-64bit-c-api.tar.gz
$ sudo cp lib/libqdb-api.so /usr/lib64/
Download the Driver
First, download the QuasarDB ODBC driver. Use this command (precise the target version):
$ wget https://download.quasar.ai/quasardb/3.14/3.14.2/api/odbc/qdb-3.14.2-linux-64bit-odbc-driver.tar.gz
Once the file is downloaded, extract it using the following command (precise the target version):
$ tar xzf qdb-3.14.2-linux-64bit-odbc-driver.tar.gz
You’ll find the ODBC driver file at ./lib/libqdb_odbc_driver.so. You can move this file to a location of your choice.
The required QuasarDB C API library is also located at ./lib/libqdb_api.so. This file must be copied to /usr/lib64.
Add the Driver to the Config File
To set up the QuasarDB ODBC driver, you need to modify the driver configuration file, typically located at /etc/odbcinst.ini. Add the following lines to it:
[qdb_odbc_driver]
Description=Quasardb ODBC Driver
Driver=/path/to/libqdb_odbc_driver.so
Setup=/path/to/libqdb_odbc_driver.so
APILevel=1
ConnectFunctions=YYY
DriverODBCVer=3.14.2
FileUsage=0
SQLLevel=1
UsageCount=1
Notes
Use this command to open the file:
$ sudo nano /etc/odbcinst.ini
Type this command to get path of Driver and Setup:
$ pwd
2.3 Create a Data Source
Now, you’ll need to configure the data source. It defines the connection details and credentials to access your QuasarDB cluster.
Open the data source configuration file, usually at /etc/odbc.ini, and add these lines:
[quasardb]
Driver = qdb_odbc_driver
Description = QuasarDB ODBC Data Source
URI = cluster_uri
# UID = user_name
# PWD = user_key
# KEY = cluster_public_key
LogDir = /var/log/qdb
Please note that the UID, PWD, and KEY lines are commented out (prefixed with #) by default. This is because, in some cases, your QuasarDB cluster may not require a username and password to establish a connection. If required, you can uncomment these lines and provide the appropriate credentials.
After completing the setup, it’s essential to test the connection to QuasarDB. You can do this using the isql command or with Python and the pyodbc package:
Using isql:
Replace UID and PWD with your actual username and password, or just run it without UID and PWD depending on your cluster security configuration.
$ isql quasardb UID PWD
If everything is installed successfully you will see the following:
$ isql quasardb

+---------------------------------------+
| Connected!                            |
|                                       |
| sql-statement                         |
| help [tablename]                      |
| echo [string]                         |
| quit                                  |
|                                       |
+---------------------------------------+
SQL>
The isql command is a utility that provides an interactive interface to work with ODBC data sources. It allows you to run SQL queries and test the connection to your QuasarDB.
Using Python with pyodbc:
import pyodbc

try:
    connection = pyodbc.connect("DSN=quasardb")
    connection.setencoding('utf-8')
    connection.setdecoding(pyodbc.SQL_CHAR, encoding='utf-8')
    connection.setdecoding(pyodbc.SQL_WCHAR, encoding='utf-8')
    connection.setdecoding(pyodbc.SQL_WMETADATA, encoding='utf-8')
    cursor = connection.cursor()
    query = 'select count(unique_tagname) from "pi/0000"'
    cursor.execute(query)
    for row in cursor.fetchall():
        print(row)
except Exception as e:
    print(e)
3.5.4. Driver Parameters#
Here is a list of the most common parameters, you can either set them in the dsn or the connection string you use.
Parameter
Description
LOGDIR
A path to the folder in which you wish our log file to be stored
URI
A cluster URI you wish to connect to
UID
The username you log in with
PWD
The secret_key/password provided in the private key file
KEY
The cluster public key file content
DSN
The name of the datasource
DESCRIPTION
A description of this specific datasource
MaxInBufferSize
Maximum incoming buffer size for all network operations
MaxParallelism
Number of threads that will be used to execute queries
3.5.5. Configuring Log rotation#
Log rotation is like a digital tidying-up tool for your computer’s log files, offering several benefits:
Stay Organized: It helps keep log files neat and prevents them from becoming too large, saving your computer space.
Effortless Search: Log rotation organizes log files for easy access, making it simple to find important information.
Troubleshooting Aid: When issues arise, older log files are available for reference, making it easier to identify and resolve problems.
3.5.5.1. Parameters#
max_log_file_size is the maximum size in bytes of the current log file. The ODBC driver won’t rotate the log if the value is zero. The driver will cut the log file when the actual log size surpasses this option value. This option requires keep_log_file_num to be more than zero. Default to zero.
keep_log_file_num is the maximum number of the old log files to store. Default to zero.
log_level is the log level that the ODBC driver will take. The value starts from 0 to 3 (0 = none, 1 = error, 2 = info, 3 = debug). Default to 2 (info).
3.5.5.2. Scenario#
Imagine you’re using the QuasarDB ODBC driver on your Windows computer, and you want to ensure that log files are managed efficiently. You prefer to keep log files from becoming too large and want to maintain one old log file as a backup when the log file reaches 64 MiB. Here’s how you can set this up:
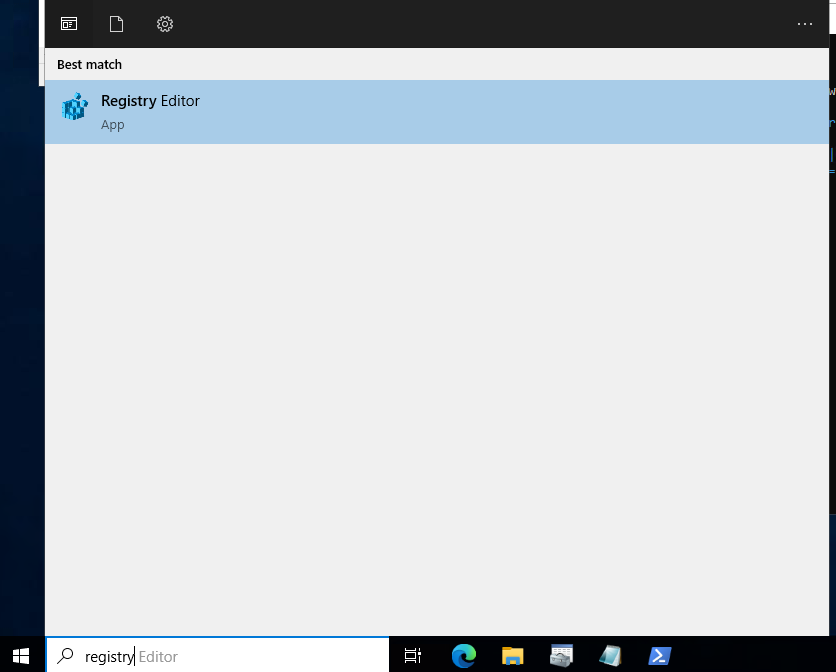
Step 1: Access Windows Registry Editor
Open the Windows Registry Editor by pressing the Windows key, typing regedit in the search bar, and pressing Enter.
Step 2: Navigate to ODBC Driver Settings
In the Registry Editor, navigate to the settings for the QuasarDB ODBC driver. The path may vary depending on your system and driver installation, but it could look like
HKEY_CURRENT_USER\\Software\ODBC\ODBC.INI\quasardb.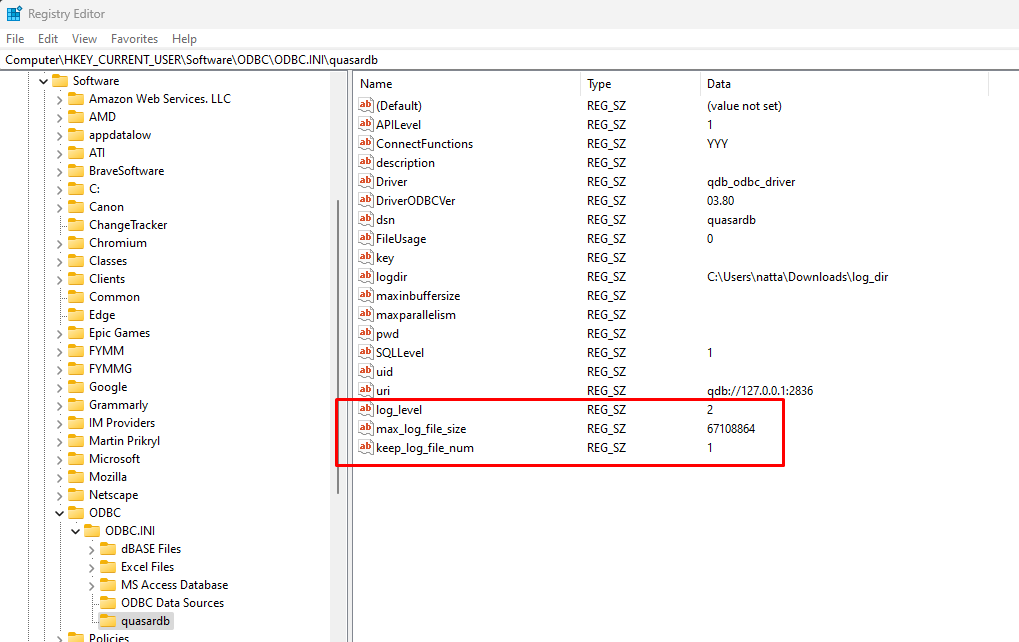
Step 3: Configure Log Rotation Parameters
Find the entry for “max_log_file_size” and double-click it to edit the value. Set it to 67108864 to specify that log rotation should occur when the log file reaches 64 MiB.
Similarly, locate the entry for “keep_log_file_num” and double-click it to edit the value. Set it to 1 to ensure that one old log file is kept as a backup.
Step 4: Save Your Changes
After making these adjustments, click OK to save your changes.
Step 5: Restart ODBC Driver (if necessary)
Some changes in the Registry may require you to restart the ODBC driver to take effect. You can do this by restarting the ODBC driver service or application.
3.5.6. PyODBC#
3.5.6.1. Using the Driver or DSN with PyODBC#
Pyodbc is a library that people often use with Python when they want to work with databases using an ODBC driver. It’s like a bridge that allows Python to understand and use the QuasarDB ODBC driver.
3.5.6.2. Prerequisites#
Ensure that Python is installed. If not, download it from the Python website .
Install the pyodbc library using the following command:
$ pip install pyodbc
3.5.6.3. Executing the Code#
Copy the provided code.
Open your Python environment or an integrated development environment (IDE).
Paste the code into a new Python script.
Save the script with a .py file extension, e.g., “quasardb_query.py”.
Open your command-line terminal (e.g., Command Prompt on Windows or Terminal on Linux).
Navigate to the directory where you saved the script using the “cd” command.
Run the script using Python by typing the following command:
$ python quasardb_query.py
In this example we will use it to display some common operations.
import pyodbc

# Connect to the driver
conn_config= "uri=qdb://127.0.0.1:2836;driver:qdb_odbc_driver;logdir=./;log_level=3"
connection = pyodbc.connect(conn_config)

# You can also connect to a dsn
# Assuming you installed a datasource named "qdb_odbc_datasource"
# connection = pyodbc.connect("DSN=qdb_odbc_datasource")

# Avoid encoding errors
connection.setencoding('utf-8')
connection.setdecoding(pyodbc.SQL_CHAR, encoding='utf-8')
connection.setdecoding(pyodbc.SQL_WCHAR, encoding='utf-8')
connection.setdecoding(pyodbc.SQL_WMETADATA, encoding='utf-8')

# The next part assume a timeseries with:
#   * 'ts' as a name
#   * values in the 2020-01-01 to 2020-01-02 range
#   * 'col' as a column with int64 values

# Query data without parameters
query = u"SELECT * FROM 'ts' IN RANGE(2020-01-01, 2020-01-02);"
cursor = connection.cursor()
cursor.execute(query)
for row in cursor.fetchall():
    print(row)

# Query data with parameters
query = u"SELECT * FROM 'ts' IN RANGE(2020-01-01, 2020-01-02) where col=?;"
cursor = connection.cursor()
cursor.execute(query, 1)
for row in cursor.fetchall():
    print(row)

# pyodbc make it possible to retrieve information about all available tables
cursor = connection.cursor()
for row in cursor.tables():
    print(row)

# Another similar call enables you to get information about the columns of a specific table
cursor = connection.cursor()
for row in cursor.columns(table='ts'):
    print(row)
If you wish to customize the code:
Modify the URI in the code to match your QuasarDB setup.
Adjust the SQL queries to retrieve specific data from your database.
Tweak the encoding settings as required.
3.5.7. Extras#
3.5.7.1. Multiple versions of the Quasar ODBC driver on the same machine#
Prerequisite
- Store different versions of the Quasar ODBC driver in separate directories on your machine, such as:
/path/to/driver_version1
/path/to/driver_version2
- In each directory where you stored the driver versions, ensure you also have the corresponding qdb-api libraries. Place them in the same directory to match the driver versions, like this:
/path/to/driver_version1
libqdb-odbc-driver.so
libqdb-api.so
/path/to/driver_version2
libqdb-odbc-driver.so
libqdb-api.so
Open the ODBC driver configuration file, typically located at /etc/odbcinst.ini, using your preferred text editor (e.g., sudo nano).
In the driver configuration file, define driver sections for each version of the Quasar ODBC driver. For each driver section, specify the correct path to the qdb-api library associated with that driver version:
- For [qdb_odbc_driver_version1], specify the Driver and Setup paths pointing to the corresponding libqdb-odbc-driver.so for version 1 and libqdb-api.so for version 1
[qdb_odbc_driver_version1]
Description=QuasarDB ODBC Driver (Version 1)
Driver=/path/to/driver_version1/libqdb-odbc-driver.so
Setup=/path/to/driver_version1/libqdb-api.so
APILevel=1
ConnectFunctions=YYY
DriverODBCVer=1.0
FileUsage=0
SQLLevel=1
UsageCount=1
- For [qdb_odbc_driver_version2], specify the Driver and Setup paths pointing to the corresponding libqdb-odbc-driver.so for version 2 and libqdb-api.so for version 2:
[qdb_odbc_driver_version2]
Description=QuasarDB ODBC Driver (Version 2)
Driver=/path/to/driver_version2/libqdb-odbc-driver.so
Setup=/path/to/driver_version2/libqdb-api.so
APILevel=1
ConnectFunctions=YYY
DriverODBCVer=2.0
FileUsage=0
SQLLevel=1
UsageCount=1
Ensure that the paths in the Driver and Setup lines correctly point to the respective libqdb-odbc-driver.so and libqdb-api.so libraries for each version.
Save the changes to the driver configuration file and exit your text editor. In Nano, you can press Ctrl + O to save and Ctrl + X to exit.
By following these steps, you’ve configured your drivers to use the appropriate qdb-api library paths, preventing conflicts and ensuring compatibility with your Quasar ODBC driver versions.