3.9. Tableau#
3.9.1. Introduction#
Tableau is a data visualization and business intelligence tool designed to help you transform your data into meaningful insights. It allows you to create interactive dashboards and reports, making it easier to analyze and make informed decisions based on your data.
3.9.2. ODBC - The Bridge for Data Communication#
To use Tableau effectively, it needs to communicate with various data sources, which is where ODBC comes into play. ODBC serves as the intermediary that enables Tableau to access these data sources.
3.9.3. How It Works#
When you work with Tableau:
You connect to external data sources like databases or systems.
Each data source typically has its own ODBC driver associated with it.
The ODBC driver acts as a translator, converting Tableau’s requests into commands that the data source can understand.
For instance, if you’re connecting Tableau to a QuasarDB database, you would need the QuasarDB ODBC driver. This driver allows Tableau to effectively communicate with your QuasarDB data.
3.9.4. Prerequisite: ODBC Driver Installation#
In this tutorial, we’ll guide you through Tableau integration with ODBC, assuming you have already installed the ODBC driver. The driver’s installation isn’t covered here; please refer to the official ODBC documentation for detailed instructions on downloading, installing, and configuring the driver.
3.9.5. Important Prerequisites for Tableau Examples#
To proceed with the Tableau integration examples, you must complete two critical steps:
ODBC Driver Installation: Make sure you’ve successfully installed the ODBC driver by following the official instructions. This driver acts as Tableau’s connector to your data source.
Creating a Datasource: Configure a datasource, providing details like the server’s address, authentication credentials, and other connection parameters. This step is essential for Tableau to know how and where to retrieve your data.
Without a properly configured datasource, Tableau won’t be able to locate your data.
By ensuring that these prerequisites are in place, you’ll be ready to dive into the Tableau integration examples.
For is the complete list of the parameters refer to Driver parameters section in official ODBC guideline. You can either set them in the dsn or the connection string you use.
Any unmentionned field will be filled with a default value.
3.9.6. First connection#
Choose Other Databases (ODBC) and choose the DSN.
You can then select quasardb_local in the DSN field, then click on connect:
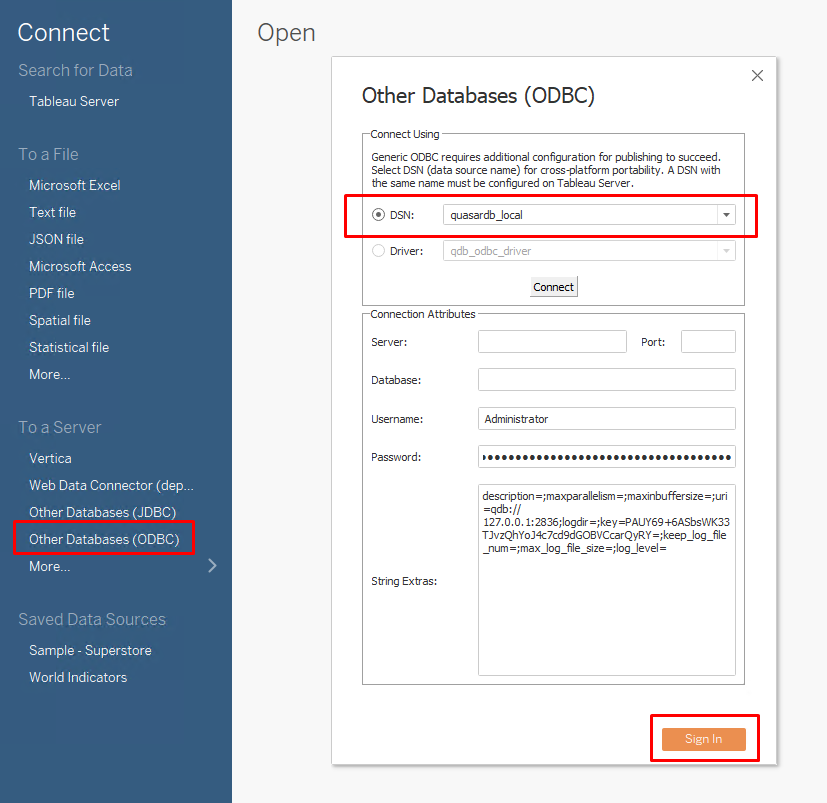
The String Extras will show up after the connection succeeded.
If the connection suceeded, click on sign in to continue.
Well done, you’re now connected to the qdb datasource.
3.9.7. Querying data#
In this example we will assume we have a timeseries test with a column col_a.
You can create it in qdbsh with the following statements:
qdbsh> CREATE TABLE test(col_a INT64)

qdbsh > INSERT INTO test ($timestamp, col_a) VALUES (2023-01-01, 1)

qdbsh > SELECT * FROM test
$timestamp                       $table   col_a
------------------------------------------------
2023-01-01T00:00:00.000000000Z     test       1

Returned 1 row in 18,029 us
Scanned 1 point in 18,029 us (55 rows/sec)
You can check the result by querying the table.
Double click on “New Custom SQL”.
SELECT * FROM test
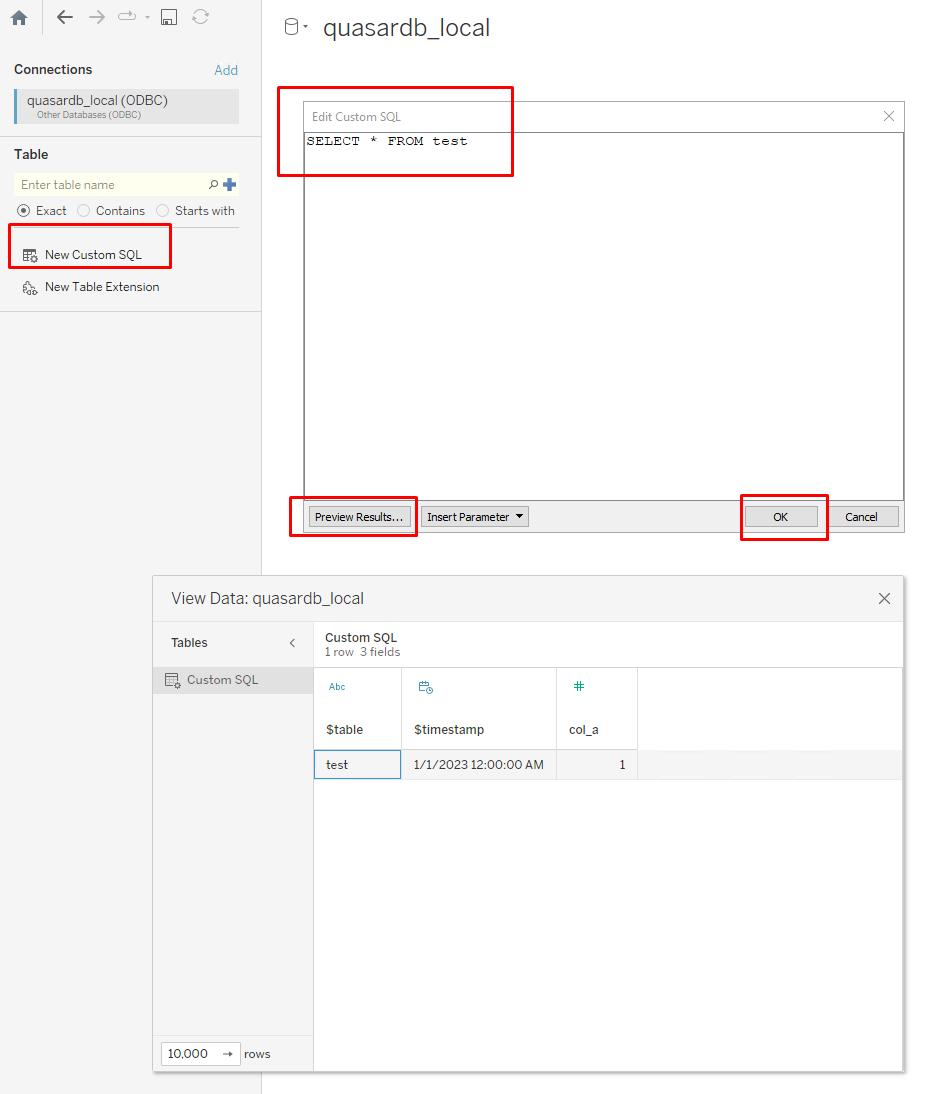
Then, input the query you want, and press “Preview Results…”.
If the preview is good, close the preview window and click “OK”.
3.9.8. Extract data#
On the top left of the window, choose “Extract” to fetch and store the data. Then, go to worksheet at the bottom left. You will be asked to save the data source.
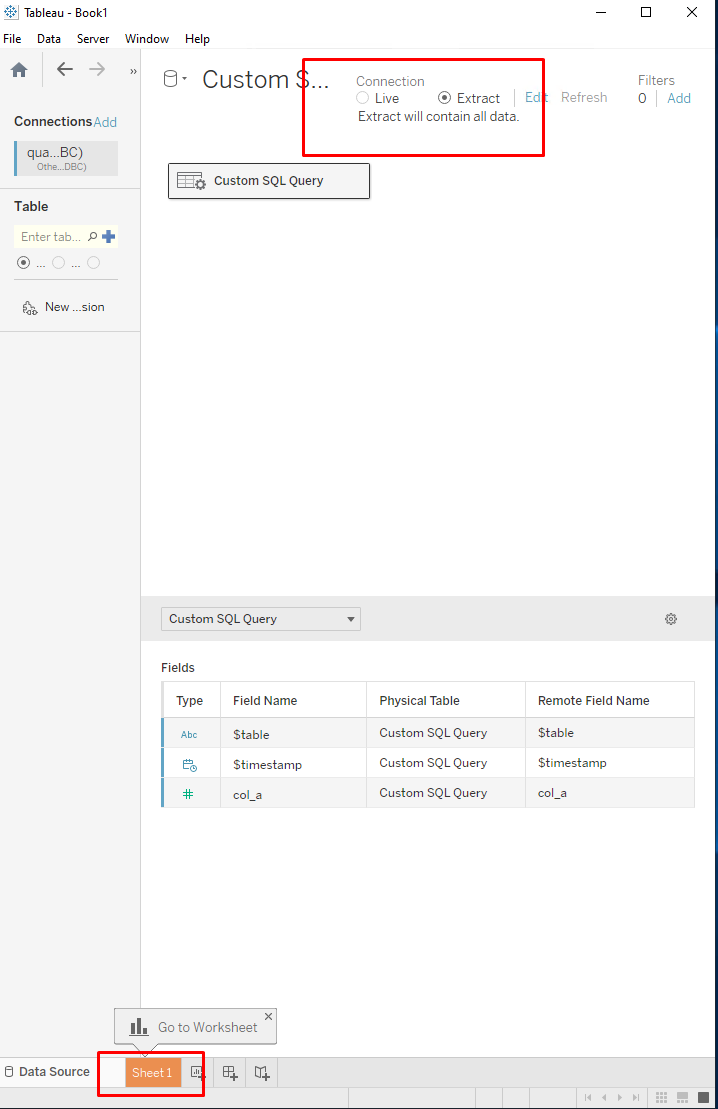

Then go to the sheet in the bottom left corner:

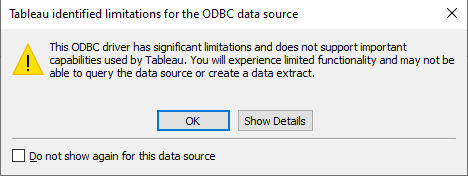
It will ask you to save the extraction, a few warnings may show up, continue to the main sheet.
Example of a warning:
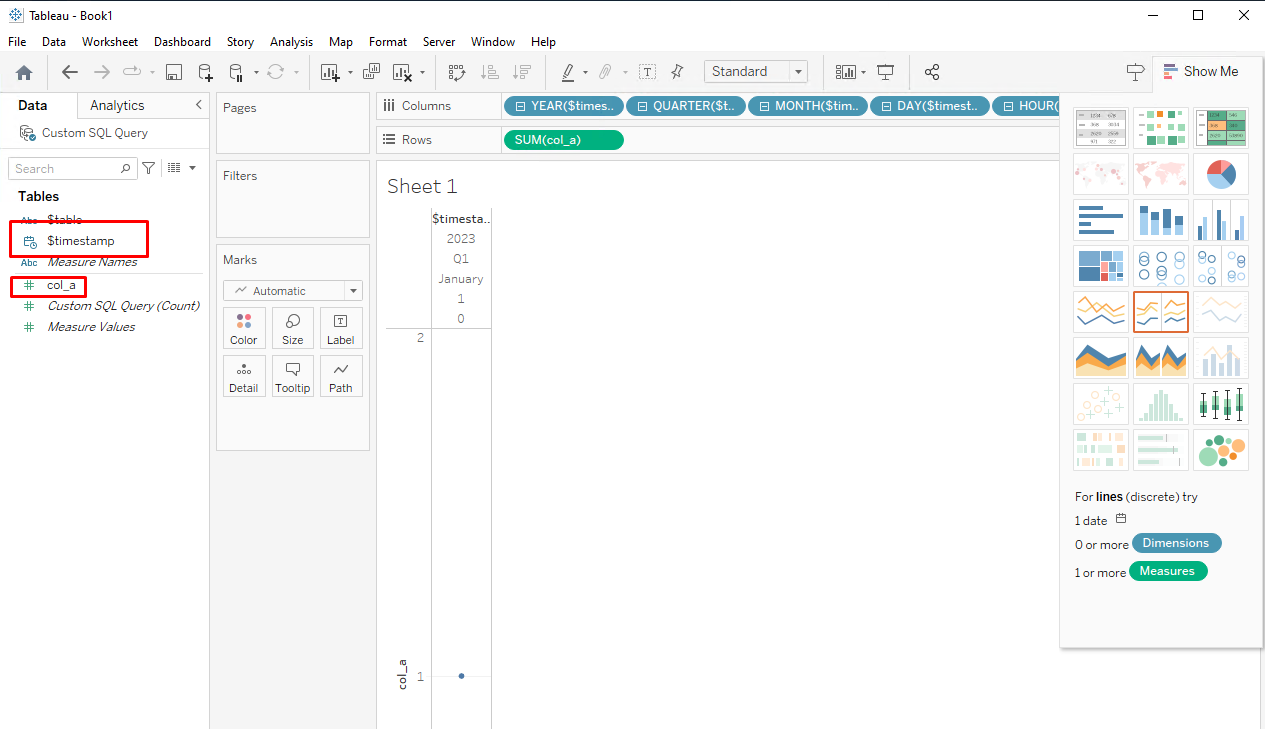
Select this graph type:

Afterward, you can use the data in the worksheet. By default the unit for the timestamp is YEAR.
